December 10, 2025
Distressing furniture how to: Quick, Pro-Level Techniques to Transform Pieces
Distressing furniture how to: Discover step-by-step methods for sanding, painting, and waxing to revive your pieces (distressing furniture how to).
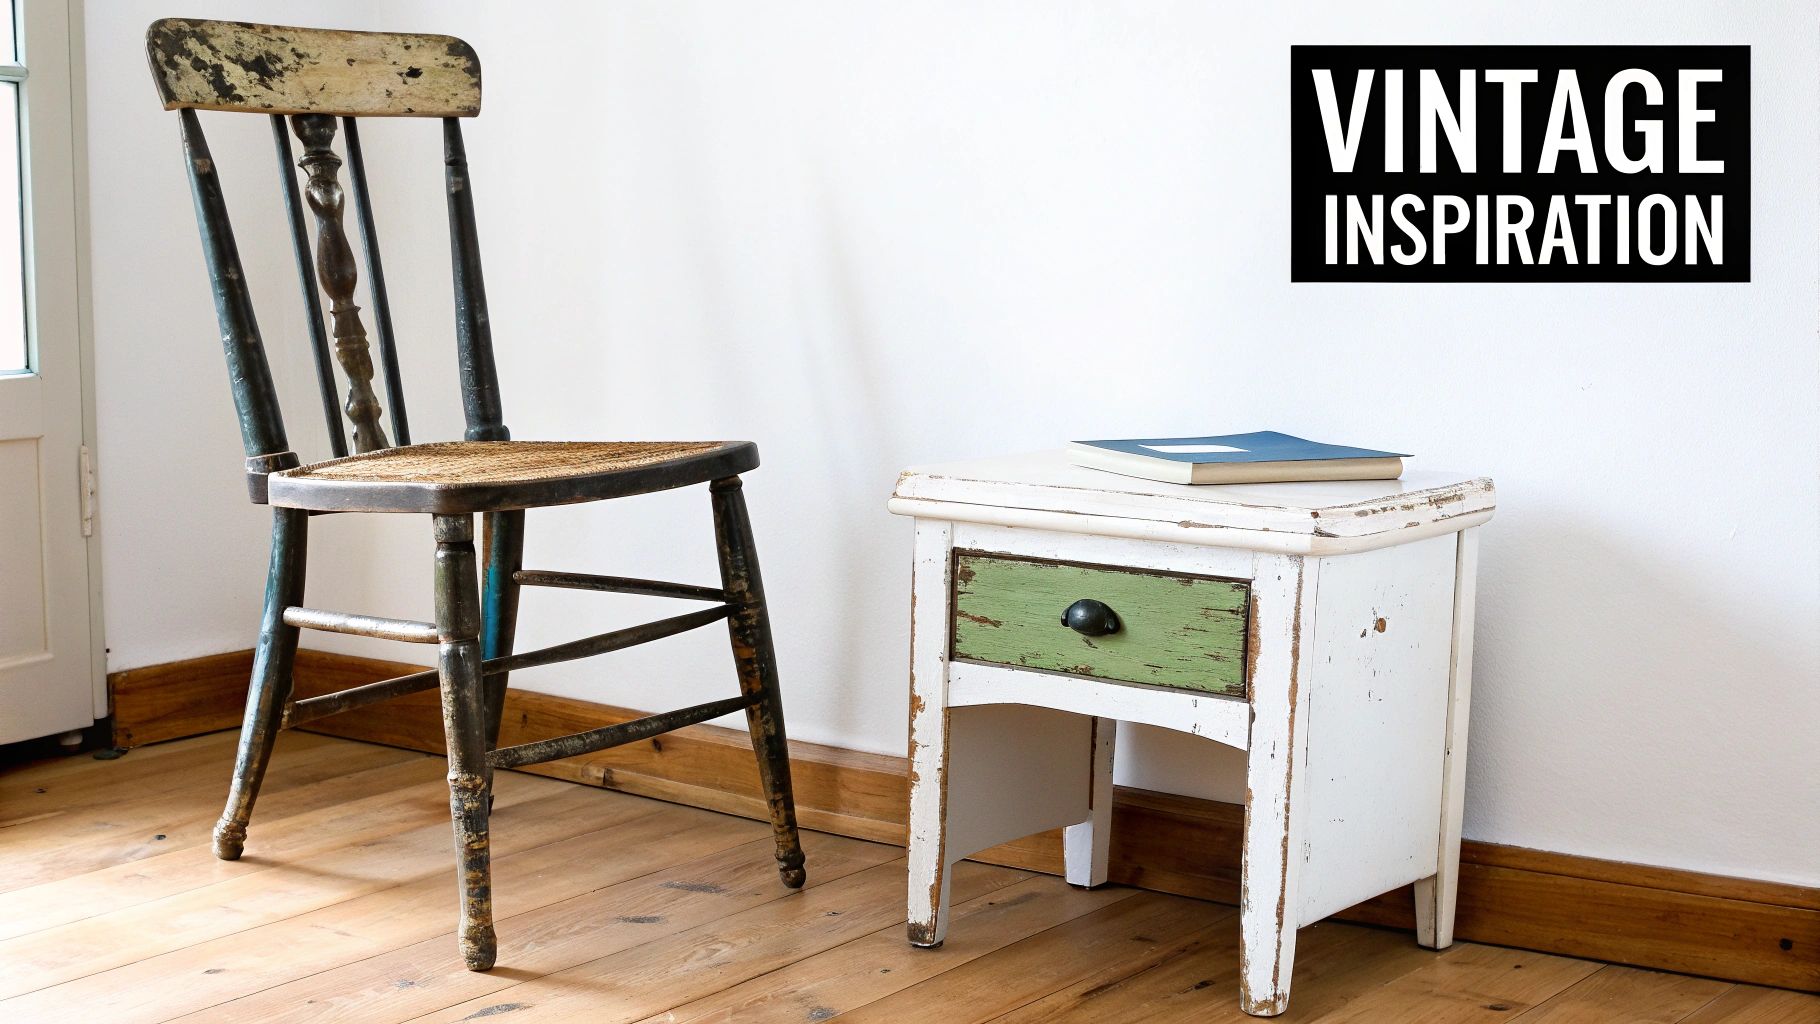
Distressing furniture is all about creating a story. You're taking a piece, new or old, and intentionally giving it the weathered, well-loved look of a vintage treasure. The basic idea is to mimic years of natural wear and tear by sanding, layering paint, and using special finishes. It’s a wonderfully creative way to breathe character and charm into your home.
Your Guide to Creating Vintage-Inspired Furniture
Welcome to the art of distressing. This isn't about chasing a flawless, factory-perfect finish—quite the opposite. It's about telling a story with every brushstroke, scuff, and layer of wax. The real beauty of learning how to distress furniture is turning an ordinary item into something truly unique that reflects your personal style. Whether you’re after a subtle farmhouse vibe or a bold, shabby-chic statement piece, you're in complete control.
This guide is here to break it all down, showing you that with a bit of patience and a splash of creativity, anyone can get stunning results.
Why Bother Distressing Furniture?
Choosing to distress a piece of furniture is more than just a style move; it’s a smart, sustainable, and budget-friendly way to update your space. You can rescue a thrift store find or finally do something with that dated family heirloom without breaking the bank. As the global furniture market grows, with consumer demand on the rise, upcycling has become a seriously popular trend. You can dig into the numbers in the full report from Fortune Business Insights.
From my experience, this approach lets you:
- Create Custom Decor: You can perfectly match any color scheme or design aesthetic, from rustic farmhouse to breezy coastal.
- Add Real Personality: It infuses your home with pieces that feel like they have a history and a soul.
- Save a Ton of Money: It’s amazing how you can turn free or cheap furniture into something that looks incredibly high-end.
Embracing the Beauty of Imperfection
The whole idea behind distressing is to celebrate imperfection. A little scratch or an uneven coat of paint isn't a mistake—it's character. This makes it an incredibly forgiving DIY project, which is great news if you're just starting out. You're essentially trying to replicate the natural aging process, where a piece would show the most wear on its most-used spots.
Distressing is about building layers of history. You're creating a narrative for your piece, suggesting it has been loved and used for generations, even if you just finished it last weekend.
Just think about how an old door frame gets worn down around the handle, or how the edges of a chair soften over decades. Those are the very details you'll learn to recreate. This style also pairs beautifully with a range of decor themes, including the elegant and timeless look of French Provincial interiors. If that classic aesthetic catches your eye, you should check out our guide on achieving the French Provincial interior design style.
Gathering Your Supplies and Prepping the Piece
A truly beautiful distressed finish isn't just slapped on; it's earned through smart preparation. I can't tell you how many times I've seen a project go sideways because someone got impatient and skipped the prep work. Before you even touch a paintbrush or a piece of sandpaper, getting your tools in order and your furniture ready is absolutely the most critical step.
Think of it this way: you wouldn't paint on a dirty, greasy canvas, right? The same logic applies here. Taking the time to clean and sand properly ensures your paint will actually stick and your distressing looks intentional, not like a happy accident.
Building Your Core Toolkit
You don't need a professional workshop to get started, but having the right tools on hand makes a world of difference. You want them to work with you. Here's a look at my go-to list that I use on almost every single project.
- Cleaners: Start with a solid degreaser. I often reach for Simple Green or just mix up a 50/50 solution of white vinegar and water. These are fantastic at cutting through years of built-up grime and furniture polish that would otherwise cause your paint to fail.
- Sanding Supplies: Grab a few different grits. 80-grit is a workhorse for knocking down a stubborn old finish. 120-grit is my all-around choice for scuff sanding, and a fine 220-grit is what you’ll want for getting a buttery-smooth surface before your final topcoat. I like to have both sanding blocks (for flat surfaces) and flexible sheets (for curves and details).
- Quality Brushes: Please don't cheap out on brushes. A bad brush will shed bristles all over your masterpiece, and you'll spend more time picking them out than painting. I typically use a smaller synthetic brush for detail work and a nice natural bristle brush for applying wax finishes.
- Safety Gear: Don't forget dust masks, safety glasses, and gloves. When you start sanding old furniture, you never know what's in that old finish. It's not worth breathing that stuff in.
The Great Paint Debate: Chalk vs. Milk vs. Latex
The paint you choose is a huge decision that will completely shape your process and the final vibe of the piece. Each type has its own personality, and picking the right one is crucial for getting the look you have in your head.
| Paint Type | Best For | Key Characteristic |
|---|---|---|
| Chalk Paint | A velvety, matte finish that's easy to distress. | The ultimate beginner's choice. It sticks to almost anything with minimal prep and sands off like a dream for a soft, time-worn effect. |
| Milk Paint | An authentically chippy, crackled, primitive look. | This is the real deal for an antique look. It naturally flakes and chips as it dries, creating a genuinely old aesthetic that's perfect for farmhouse or primitive styles. |
| Latex Paint | A durable, budget-friendly, and more modern distress. | It definitely needs a primer to adhere well, but it's a great, cost-effective option. It works especially well for layered techniques where you sand through one color to reveal another. |
Picking the right paint here is a lot like deciding how to paint a feature wall in a room—the type of paint you choose sets the tone for everything else.
Your Non-Negotiable Prep Steps
With your supplies ready to go, it’s time to get your hands dirty. This part is all about two things: cleaning and sanding. If you rush this, you're just asking for peeling paint later on.
First, give that piece a deep clean. Use your degreaser and some lint-free rags and wipe down every square inch. Don't forget the insides of drawers and the underside! You'll probably be disgusted by the amount of gunk that comes off. Let it dry completely before you do anything else.
Proper preparation is 90% of the work. The effort you put into cleaning and sanding now pays off tenfold in the durability and beauty of your final piece. Don't cut corners.
Next up is sanding. The goal here isn't necessarily to strip the piece down to bare wood. If the existing finish is still in decent shape, all you need is a quick "scuff sand" with 120-grit paper. This just means you're lightly roughing up the surface to give the new paint something to hang on to.
However, if the old varnish is flaking off or badly damaged, you’ll need to be a bit more aggressive with a lower grit paper to get a smooth, stable foundation. Once you're done sanding, always wipe away every last bit of dust with a tack cloth or a damp rag. Now, your piece is a perfect blank canvas, ready for its transformation.
Getting into the Core Distressing Techniques
Alright, with all the prep work done, we can finally get to the fun part. This is where your furniture really starts to tell a story. We’re moving from the grunt work of preparation to the artistry of transformation, using different methods to give your piece that perfectly imperfect, lived-in character.
Every technique I’m about to show you creates a different look, from a subtle, time-softened edge to a heavy, chippy finish you’d swear was a hundred years old. The real skill is learning to control these outcomes to get the exact look you're going for.
Let's dive into my go-to methods.
First things first, a quick reminder. A great finish starts with a solid foundation. These first three steps are non-negotiable in my book.
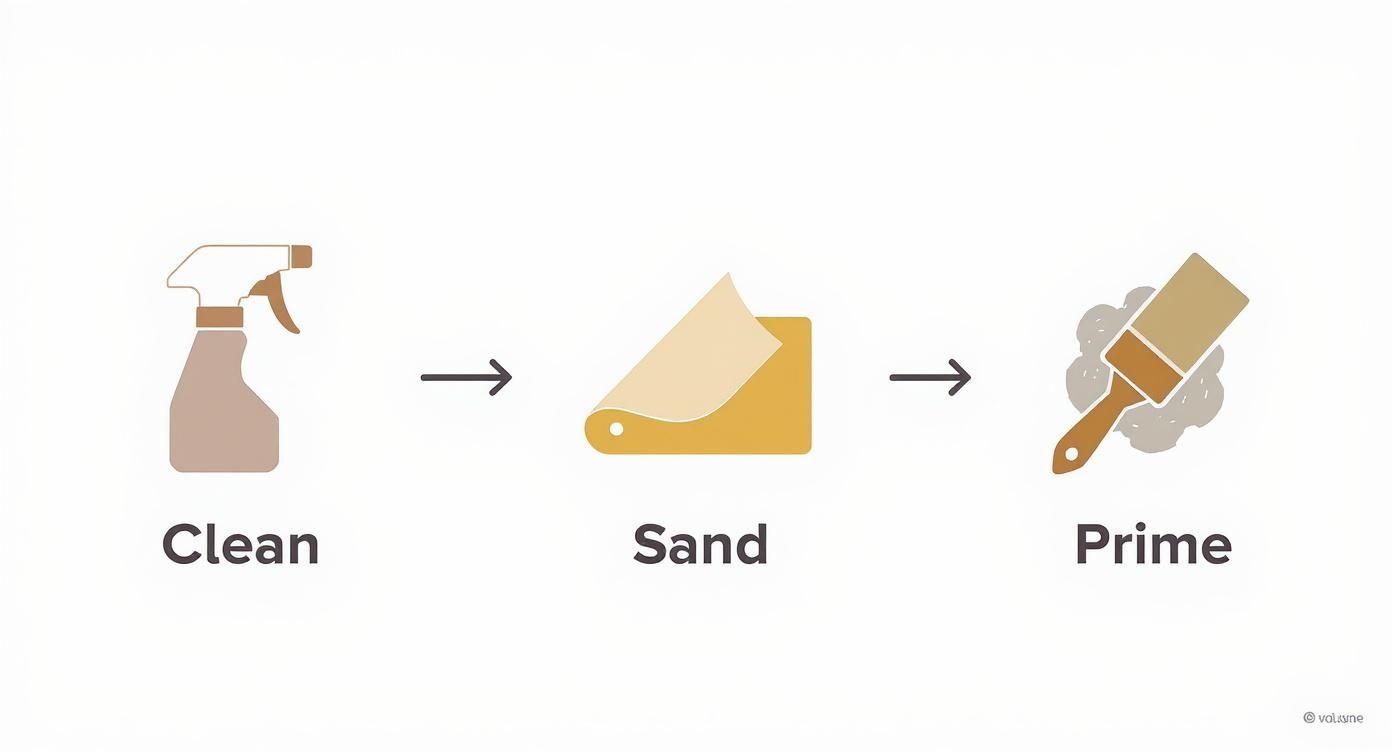
This Clean, Sand, Prime process is your insurance policy. It guarantees the paint will stick properly, making sure your distressing looks like authentic wear and tear, not a sloppy paint job.
The Classic Sanding Method
This is the most straightforward way to distress furniture, and it’s probably what most people picture when they think of this style. The idea is to simply sand off the top layer of paint in the spots that would naturally get worn down over time.
Think about where a piece of furniture gets the most contact. Those are your targets for creating a believable, aged look.
- Edges and Corners: This is the most obvious place to start. Just run your sandpaper along the sharp edges of the tabletop, drawer fronts, and legs.
- Carvings and Details: Gently scuff the raised parts of any decorative carvings or molding. This makes the details really stand out.
- Around Knobs and Pulls: The area right around the hardware gets a lot of use, so a bit of wear there always looks right.
I usually start with a 150-grit sandpaper and use light pressure. Remember, you can always take more off, but you can’t easily put it back on. I make it a habit to step back every few minutes to look at the whole piece. This helps ensure the distressing looks natural and balanced, not just like a repeating pattern.
Creating Depth with Layered Paint
This is where the real magic happens. Layering different colors of paint lets you create incredible depth and a finish that looks like it has a genuine history. You’re essentially painting on a story, then revealing bits of the previous chapters.
The Wet-Distress Technique
If you’re working with chalk or milk paint, wet distressing is a fantastic, low-dust alternative to sanding. It creates a much softer, more blended look that I absolutely love.
Here’s the trick: after your top coat of paint is dry to the touch but not fully cured (usually within an hour or two), grab a damp, lint-free rag. Gently rub it on the spots you want to distress. The water reactivates the paint just enough to let you wipe it away, revealing the color or wood underneath with a beautifully feathered edge.
The Wax Resist Method
This is one of my all-time favorite tricks for getting an authentic, chippy paint finish. It works by creating a barrier—the wax—that prevents the top coat of paint from sticking properly.
It’s surprisingly simple:
- Paint your base coat (this is the color you want to show through the chips) and let it dry completely.
- Grab a wax block, an old candle, or even a plain wax crayon. Rub it on the edges, corners, and a few random spots where you want the paint to look like it’s flaked off.
- Now, paint your top coat right over everything, wax and all.
- Once that top coat is dry, take a putty knife or some fine-grit sandpaper and lightly scrape or scuff the waxed areas. The paint will peel and chip away effortlessly.
The resist method is your secret weapon for controlled chipping. It perfectly mimics how paint naturally fails over time, but you get to be the artist deciding exactly where it happens.
This technique is a must for achieving that classic farmhouse or rustic style. It’s also a great example of how upcycling and giving old pieces new life is a huge trend. People are getting more creative with what they have, and skills like this are becoming more popular. If you're interested in how these larger trends are shaping what's next, you might find this read on future furniture market dynamics interesting.
The Art of Dry Brushing
Dry brushing is all about subtlety. It’s a technique for adding just a whisper of color, texture, and highlights without painting a solid coat. It's the perfect finishing touch.
Just dip the very tips of your brush bristles in your paint, then blot almost all of it off on a paper towel until the brush looks practically dry. Lightly sweep the brush over the surface, letting it just kiss the raised details, edges, and wood grain. This leaves behind a delicate trace of color, giving the piece a dusty or sun-bleached look that adds tons of realism.
It’s a versatile skill that works on more than just furniture. I’ve used a similar approach to bring out the texture in architectural features, too. In fact, if you want to see how this works on something else, check out our guide on tackling a '70s stone fireplace makeover.
Finishing Touches: Waxes, Glazes, and Hardware
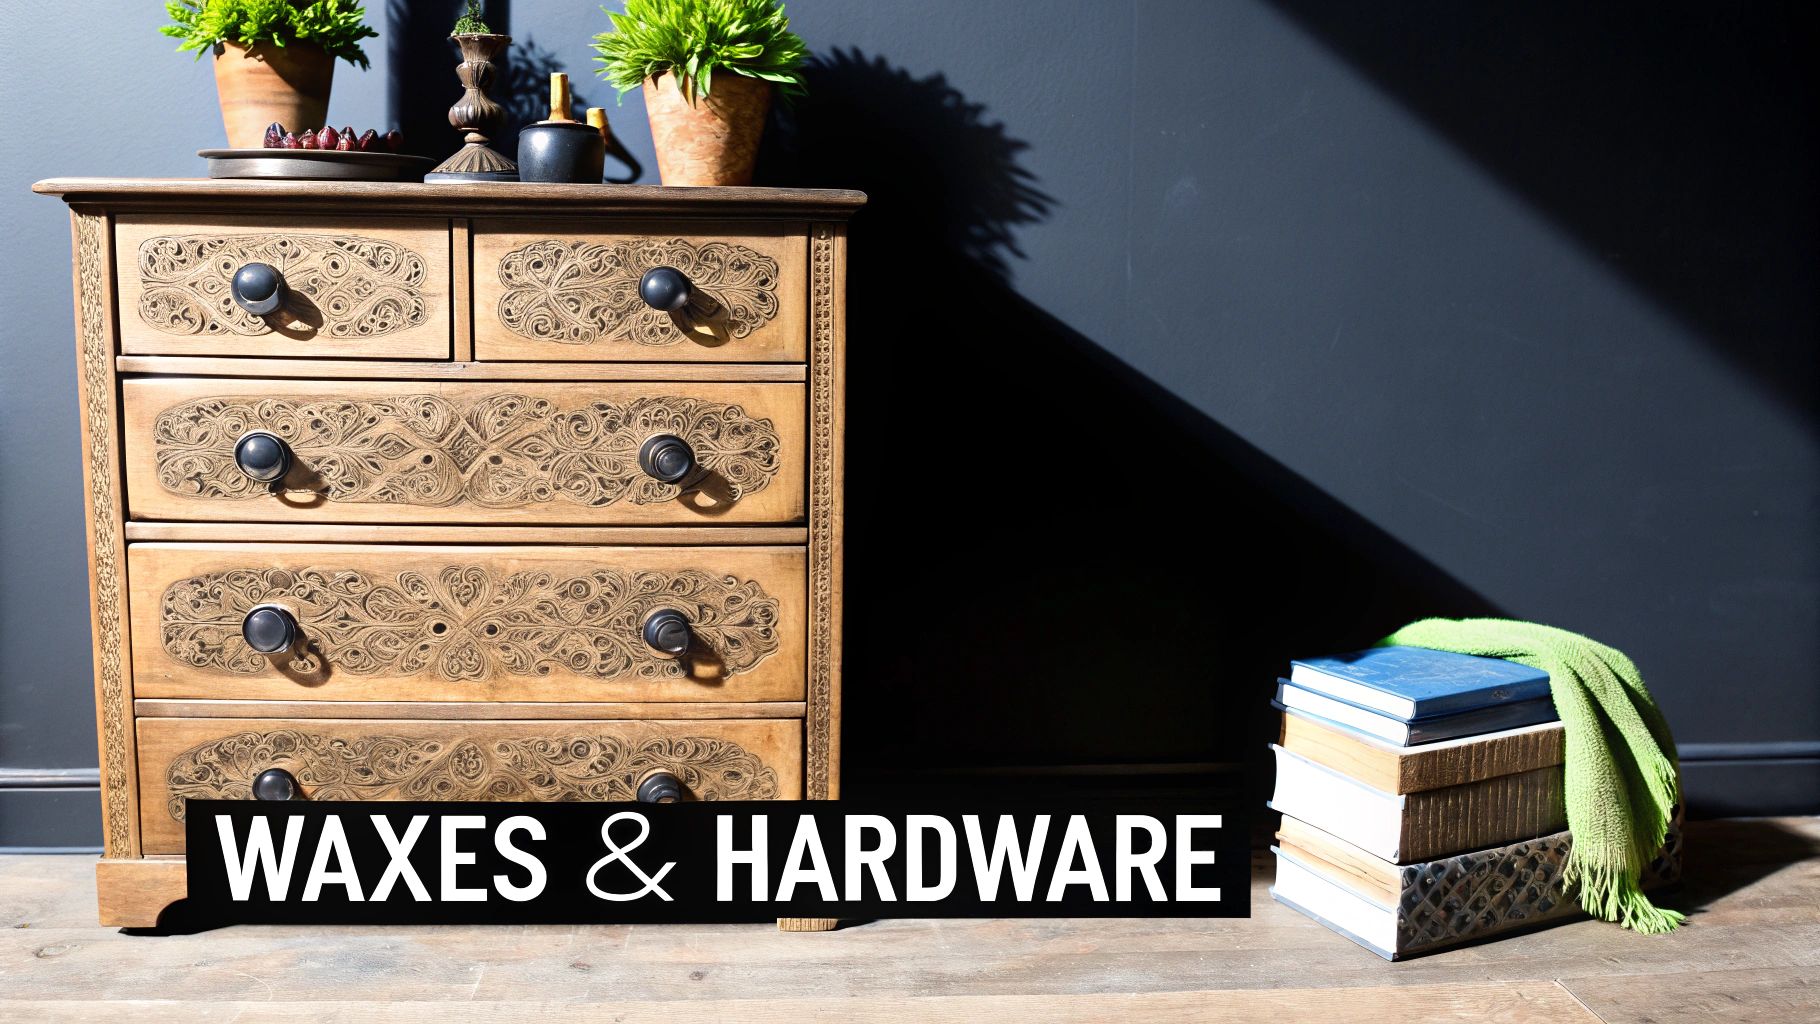
This is where the magic really happens. You’ve done the hard work of sanding, layering paint, and creating that perfectly imperfect finish. Now it's time for the details that take a piece from simply "painted" to truly authentic and full of character. Waxes, glazes, and the right hardware are what will give your project that convincing sense of history.
Think of this final stage as the seasoning in a great recipe. A strategic swipe of dark wax can add ten years of age in ten minutes, while a new set of antiqued knobs can redefine the entire piece. Don't rush it—this is your chance to add nuance and soul.
Using Waxes to Age and Protect
In the world of furniture distressing, wax is one of your most powerful tools. It’s more than just a topcoat for protection; it's an artistic medium that can completely change the tone and texture of your work. Getting familiar with the different types is crucial for nailing the look you’re after.
- Clear Wax: This is your go-to sealer. It deepens the paint color and leaves a beautiful, buttery-soft matte finish. I always, always apply a thin coat of clear wax before I even think about touching the colored waxes. It gives you more control.
- Dark Wax: Here's the secret sauce for instant aging. When you work it into the nooks, crannies, and carved details (over your clear wax base), it perfectly mimics the grime and dust that would naturally accumulate over decades. It makes all those interesting details pop.
- White Wax: If you're going for a softer, limed look or a coastal farmhouse vibe, white wax is your best friend. It settles into the grain and details, giving the piece a gentle, sun-faded feel that looks stunning on lighter paint colors.
My best advice for applying wax? A little goes a long way. Use a natural bristle wax brush to work a small amount into the surface, then immediately wipe back the excess with a clean, lint-free cloth. You want the surface to feel smooth and dry to the touch, not sticky or oily.
Glaze vs. Wax: What's the Difference?
While waxes are a classic choice, glazes give you another fantastic option for adding dimension. They’re much thinner, more translucent liquids that you brush over your paint to subtly shift the color and get into all the fine details.
| Feature | Finishing Wax | Glaze |
|---|---|---|
| Primary Use | Sealing and aging with a soft, matte finish. | Adding translucent color and highlighting details. |
| Application | Applied with a brush or cloth, then buffed. | Brushed on and wiped back to the desired effect. |
| Best For | Achieving an authentic, hand-rubbed antique look. | Creating a color wash or settling in fine details. |
| Dry Time | Longer cure time (can be up to 30 days). | Dries much faster, often within a few hours. |
I find glaze works wonders when I want to add a sheer wash of color, like a hint of brown over white paint to give it a warm, aged patina. But for that deep, "settled-in-the-crevices" look that is the hallmark of so many distressed styles, I almost always reach for dark wax.
Aging and Selecting Hardware
Never underestimate the power of hardware—it's the jewelry of your furniture. Putting shiny, new knobs on a heavily distressed dresser is a dead giveaway and can ruin the whole effect. Fortunately, it's surprisingly easy to age new hardware or bring old pieces back to life.
One of my favorite tricks for cleaning up old brass hardware is to simmer it in a pot with equal parts water and vinegar. Once it cools, a little buffing with fine steel wool brings back its original charm without making it look brand-new. It's a great way to save money and honor the piece's history.
Hardware is the final punctuation mark on your project. Choosing a style that complements the era and feel of your distressing—like antiqued brass pulls for a farmhouse look or dark iron knobs for a primitive style—unifies the entire piece.
This move toward unique, character-rich furniture is part of a much bigger picture. The global furniture industry is booming as people look for more personalized decor. You can actually discover more insights about the global furniture industry on csilmilano.com to see how this trend is shaping the market. Your project is a perfect example of this shift toward story-driven design.
So whether you’re restoring the original pulls or buying new ones to age yourself, take your time. This final step is what will make your beautifully distressed furniture look completely finished and thoughtfully designed.
Sealing Your Work and Avoiding Common Mistakes
You’ve done it. You sanded, painted, and distressed your piece to perfection. It finally has that character you were aiming for. Now, you’ve got to protect all that hard work. This final step is crucial—it’s not just about protecting the surface, it’s about locking in the beauty of your finish for years to come.
Skipping this step is honestly one of the biggest mistakes I see people make. An unsealed piece is a magnet for spills, scuffs, and just the general chaos of daily life, which can quickly ruin the look you just spent hours creating.
Let's get into how to choose the right topcoat and what to do when those little issues inevitably pop up.
The Big Decision: Topcoat or Finishing Wax?
When it comes to sealing your masterpiece, you're usually looking at two main contenders: polyurethane (or its water-based cousin, polycrylic) and finishing wax. Your choice here will make a huge difference in both the durability and the final look of your furniture, so it’s important to know what you're getting into.
Finishing wax is the classic, old-school choice for a reason. It beautifully melts into chalk or milk paint, leaving behind a soft, buttery, matte finish that feels amazing. It’s absolutely perfect for decorative items or low-traffic pieces—think a console table in the hallway or a bedroom dresser. The trade-off? It’s not as tough and will need a fresh coat every year or so to keep up its protective game.
Polyurethane, on the other hand, is the workhorse. This stuff creates a highly durable, plastic-like shell over your paint, giving you serious protection against water, heat, and scratches. It's really the only smart choice for high-traffic surfaces like dining tables, coffee tables, or kitchen chairs. Just a quick tip: make sure to grab a water-based polycrylic for your light-colored pieces, as the traditional oil-based polyurethane can develop a yellowish tint over time.
Think of it this way: Wax gives you an authentic, hand-rubbed feel that becomes part of the piece. Polyurethane provides a protective barrier that sits on top of it. Choose based on how the furniture will live its life in your home.
Applying Your Sealer for a Flawless Finish
Your application technique is everything. A rushed job can leave you with ugly streaks, bubbles, or a surface that stays sticky forever.
If you’re using wax, grab a dedicated wax brush or a clean, lint-free cloth. Work in small, manageable sections and apply a thin, even layer. Here’s the most important part: wipe back the excess right away. If you leave too much on, it will feel tacky and become a dust magnet. You're aiming for a smooth surface that feels dry to the touch, not greasy.
For polycrylic, you'll want a high-quality synthetic brush. Apply your coats thin and even, always moving in one direction with the grain. The biggest rookie mistake is over-brushing, which is a surefire way to introduce bubbles. It’s always better to apply 2-3 thin coats—letting each one dry completely and lightly sanding with 220-grit paper in between—than to slop on one thick, goopy coat. A little patience here pays off big time with a crystal-clear, durable finish.
Fixing Common Distressing Mistakes
Look, even those of us who have been doing this for years run into problems. Knowing how to fix them is what turns a frustrating project into a successful one.
Here are a few common hiccups and how to deal with them:
- You Over-Distressed a Spot: We've all been there. If you got a little too carried away with the sandpaper, don't panic. Just grab a small artist's brush, touch up the area with your paint, and let it dry. Then you can go back and gently re-distress it.
- Your Wax Finish is Sticky: This almost always means too much wax was applied and not enough was wiped away. The fix is simple: apply another very thin coat of wax right over the sticky area. The new wax will reactivate the old layer, letting you properly buff it all off with a clean cloth.
- The Paint is Peeling or Chipping Unexpectedly: If paint is flaking off in areas you didn't intend, it's probably a prep issue. You'll have to sand that problem spot back down, clean it really well to get rid of any dust or grease, and maybe even use a bonding primer before you repaint.
Learning to distress furniture is a creative journey. Once you nail down how to seal your work and fix the little things that go wrong, you’ll be ready to turn any piece into a lasting treasure you can be proud of.
Got Questions About Distressing Furniture?
Alright, let's wrap up by digging into some of the most common questions that come my way. When you're just starting, it's natural to have a few "what ifs" running through your head. A little bit of clarity can be all you need to dive in with confidence.
Think of this as your go-to guide for those little hurdles you might encounter. We'll cover everything from picking the right piece to the quirks of different materials. These are the answers I really wish someone had handed me when I first started this journey.
What’s the Easiest Piece for a Beginner to Distress?
If you're new to this, my advice is always the same: start small and simple. You'll find the easiest pieces are solid wood items like side tables, picture frames, or small bookshelves. Why? Their clean, straight lines are perfect for getting the hang of basic sanding without feeling overwhelmed.
This is your training ground. You'll learn how much pressure to use and where distressing looks most natural. Another pro tip: grab something from a thrift store or a piece you're not emotionally invested in. It takes all the pressure off and turns the project into a fun experiment—which is exactly how it should feel. Steer clear of things with intricate carvings or delicate veneers until you’ve got a project or two under your belt.
Can I Actually Distress Laminate or Veneer?
You sure can, but it’s a completely different ballgame. With laminate or veneer, you can’t just sand through the top to reveal beautiful wood grain, because there's no solid wood to expose. Trying to do so will just ruin the thin surface.
So, your focus shifts entirely to creating distress within the paint layers. Success here is 100% about doing the prep work right.
- Scuff It Up: First, you have to give that glossy surface a light scuff with fine-grit sandpaper (something in the 180-220 range). This creates a "tooth" that helps the primer grab hold.
- Prime with a Purpose: This is the step you absolutely cannot skip. A high-quality bonding primer is your best friend. It’s what ensures the paint actually sticks and doesn’t just peel off a few months down the line.
- Get Creative with Paint: The aging effect comes from techniques that work on the surface. Think dry brushing to add texture, layering two different paint colors and gently sanding to let the base color peek through, or using dark wax to add depth in the nooks and crannies.
How Do I Choose Between Wax and Polyurethane for a Topcoat?
Deciding between finishing wax and polyurethane really boils down to two things: how the piece will be used and the final look you're after.
Finishing wax gives you a soft, matte finish that feels wonderfully authentic. It’s my go-to for decorative or light-use furniture—a console table in the hallway, a nightstand, or a pretty accent chair. The trade-off is durability. It's not as tough against water and scratches, and you’ll need to reapply it every year or so to keep it protected.
Polyurethane (or a water-based Polycrylic) is the workhorse. It delivers tough, hard-wearing protection that creates a durable shell against spills, heat, and daily abuse. For any high-traffic piece like a dining table, coffee table, kitchen chairs, or a desk, this is really your only option.
What's the Secret to Getting That Perfect Chippy Look?
If your heart is set on that genuinely old, chippy finish where the paint looks like it’s been flaking off for decades, milk paint is your answer. There’s a reason it’s the original furniture paint.
When you apply milk paint over a slicker surface—or even use a wax "resist" in a few spots before painting—it often cracks and chips all on its own as it dries. This creates an organic, time-worn character that's nearly impossible to mimic with other paints. Chalk paint is fantastic for beginners and distresses beautifully with sandpaper for a smooth, worn look, but it won't give you that authentic flaking effect. For that classic farmhouse or primitive style, nothing beats milk paint.
Before you even pop open a can of paint, what if you could see exactly how your distressed masterpiece will fit into your room? Visualizing the end result is often the hardest part, but it's the key to feeling good about your project. With a tool like AiRoom, you can upload a photo of your space and instantly see design concepts featuring your imagined distressed piece. See how that shabby chic dresser or rustic farmhouse table truly transforms your room before you start the first step.