December 12, 2025
How to Stage a Home: Easy Steps to Wow Buyers and Sell Faster
Learn how to stage a home with practical tips on decluttering, furniture arrangement, and lighting to attract buyers and sell faster.
Before you can even think about staging, you've got to create a clean slate. That means decluttering, deep cleaning, and tucking away all those personal items that make a house your home. Once you have that blank canvas, you can start strategically placing furniture, playing with lighting, and adding tasteful decor to make the home's best features pop. The whole point is to help buyers forge an emotional connection and see themselves living there.
Why Home Staging Is Your Secret Weapon in Real Estate
Let's be clear: knowing how to stage a home isn't just about making things look pretty. It's a calculated marketing strategy. Your goal is to get buyers to stop seeing the property as your space and start picturing it as their future home. It all comes down to creating a powerful first impression that works just as well online in photos as it does during a walkthrough.
A properly staged home just feels different. When a potential buyer walks through the door, you don't want them getting sidetracked by family photos on the wall or a clutter of everyday life. You want them to see a bright, open, and welcoming space that shows off the home's full potential. This is a huge deal, because buying a home is just as much an emotional decision as it is a financial one. Good staging helps seal that emotional deal.
The Power of a Great First Impression
You only get one shot to make a first impression in real estate, so you have to make it count. Staging is how you ensure every corner of your property is presented at its absolute best. It’s not just about tidying up; it’s about selling a lifestyle. Think of an unstaged home as a rough draft—a staged home is the polished, final version that buyers can't wait to read.
Here’s why that first look is so critical:
- Visualizing the Space: Staging gives buyers a sense of scale and flow, helping them mentally place their own furniture and see how they’d live in the room.
- Highlighting Key Features: The right furniture arrangement can instantly draw the eye to a gorgeous fireplace, a stunning view, or beautiful built-in shelves.
- Creating an Aspirational Feel: A well-chosen, neutral palette and sophisticated decor create a move-in-ready vibe that buyers find incredibly appealing.
Selling Faster and for a Higher Price
Staging isn't just about looks; it delivers real, measurable results. The data shows time and again that putting a little money and effort into staging is one of the smartest financial decisions a seller can make. You’re directly investing in a higher sale price and a shorter time on the market.
Staged homes don't just sit on the market; they move. By creating an environment that buyers instantly fall in love with, you significantly reduce the time your property is listed and increase its perceived value.
The numbers don't lie. According to the Real Estate Staging Association, homes that are properly staged sell a whopping 73% faster than those that aren't. Agents are on board, too—85% of them agree that staging helps a property sell much more quickly, sometimes cutting the time on market from months to just a few days. You can dig into more of staging's impressive stats over at the Home Staging Institute. A small upfront investment here can lead to a massive return, making it a non-negotiable step for a successful sale.
Laying the Groundwork: Budget, Timeline, and Key Decisions
Before you start rearranging furniture or picking out paint colors, the most important work happens on paper. Trust me, jumping into home staging without a solid plan for your budget, timeline, and overall approach is the fastest way to get overwhelmed and waste money. A little strategic thinking upfront ensures every dollar you spend and every hour you invest works hard to get you the best possible return.
Right out of the gate, you’ll face your first big decision: should you stage the home yourself or bring in a professional? There’s no single right answer here. It really boils down to your budget, how much time you can realistically commit, and whether you have a good eye for design.
Going the DIY route can definitely save you on labor costs, but it demands a ton of your time and the ability to look at your own home with a critical, objective eye. On the other hand, hiring a pro costs more upfront, but you’re paying for their expertise, their inventory of rental furniture, and a proven system that often leads to a higher sale price and less time on the market.
This flowchart really brings that decision to life, showing how investing in staging can dramatically change your home sale's outcome.
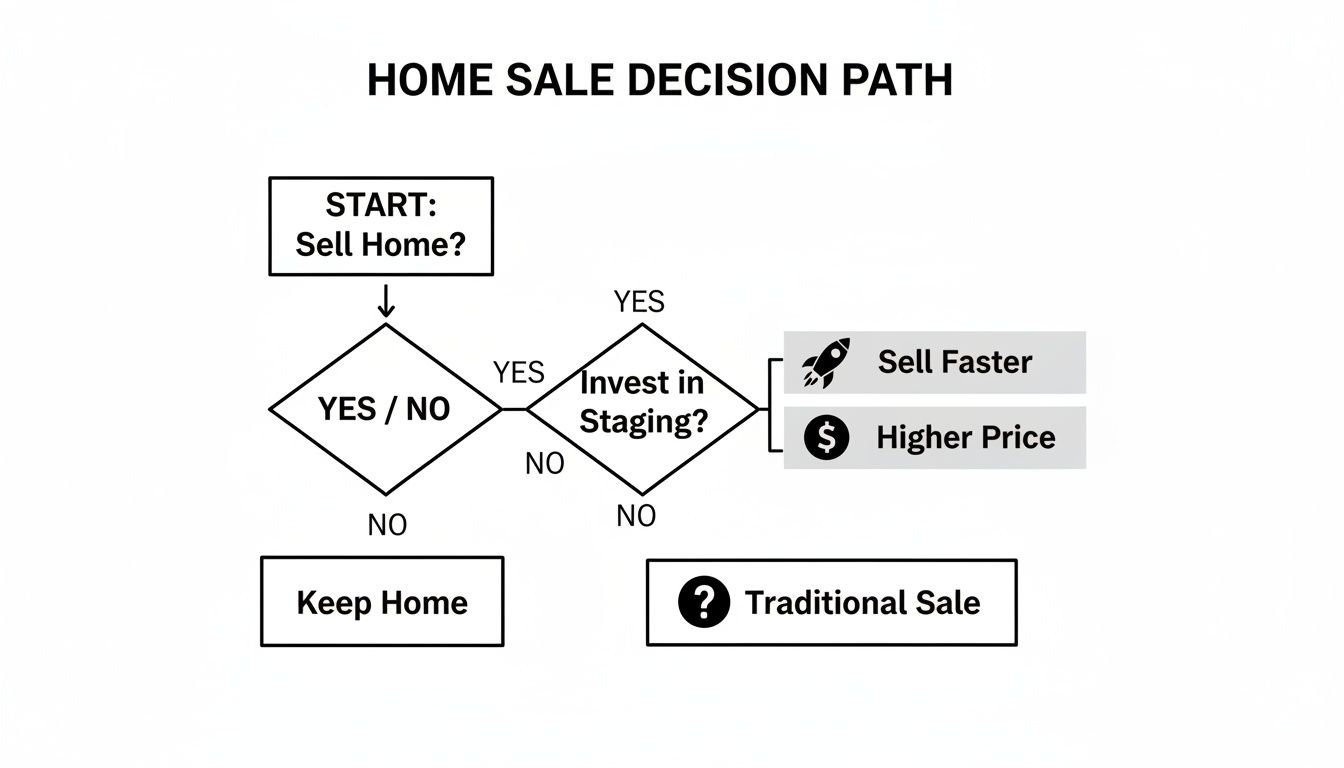
As you can see, making that commitment to stage your home is a strategic move that directly impacts how quickly you sell and for how much.
DIY vs Professional Home Staging a Cost-Benefit Analysis
To help you weigh the pros and cons, I've put together a quick comparison. Think of this as a high-level overview to help guide your gut feeling on which path is the right one for your situation.
| Factor | DIY Staging | Professional Staging |
|---|---|---|
| Upfront Cost | Lower. Primarily for materials, rentals, and storage. | Higher. Includes consultation, design, furniture rental, and labor. |
| Time Commitment | Significant. You are the project manager, designer, and laborer. | Minimal. The pro handles everything from planning to execution. |
| Expertise & Objectivity | Relies on your own design sense. Can be hard to be objective. | Access to trained professionals who know what buyers want. |
| Furniture & Decor | Use your own or buy new. Limited access to rental inventory. | Access to a wide warehouse of on-trend furniture and accessories. |
| Potential ROI | Good, but dependent on your skill and effort. | Often higher due to professional execution and market knowledge. |
Ultimately, the choice comes down to a trade-off. DIY saves cash but costs you time, while a pro saves you time but costs you cash. Both can be great options when chosen for the right reasons.
Setting a Realistic Staging Budget
If you decide to take the DIY path, you need a clear budget. A good rule of thumb is to set aside 1% to 3% of your home's asking price. So, for a $400,000 house, you'd be looking at a budget somewhere between $4,000 and $12,000. Don't let that number scare you; it's often possible to make a massive impact for far less.
Your budget should cover the essentials that give you the most bang for your buck:
- Paint and Supplies: Never underestimate the power of a fresh, neutral coat of paint. It’s one of the best investments you can make.
- Minor Repairs: Think leaky faucets, dated cabinet hardware, or scuffed baseboards. These small fixes make a big difference.
- Decor and Accessories: This is the fun part! New throw pillows, fluffy white towels for the bathroom, and a few well-placed plants can instantly breathe life into a space.
- Storage: You'll likely need to rent a small storage unit to temporarily house personal items and any bulky furniture that makes rooms feel cramped.
If you’re looking for smart ways to stretch your budget, our guide on 10 affordable interior design ideas has some great, practical tips.
Mapping Out Your Staging Timeline
Time is just as important as money in this process. Rushing through your staging checklist is a surefire way to make mistakes and end up with a home that looks half-finished. Give yourself enough breathing room to declutter properly, paint without pressure, and style everything just right before the photographer shows up.
Don't underestimate the time it takes to properly prepare your home. A well-paced schedule prevents burnout and ensures every detail is addressed, from deep cleaning to final styling touches.
Here’s a sample four-week timeline that I've seen work wonders for sellers:
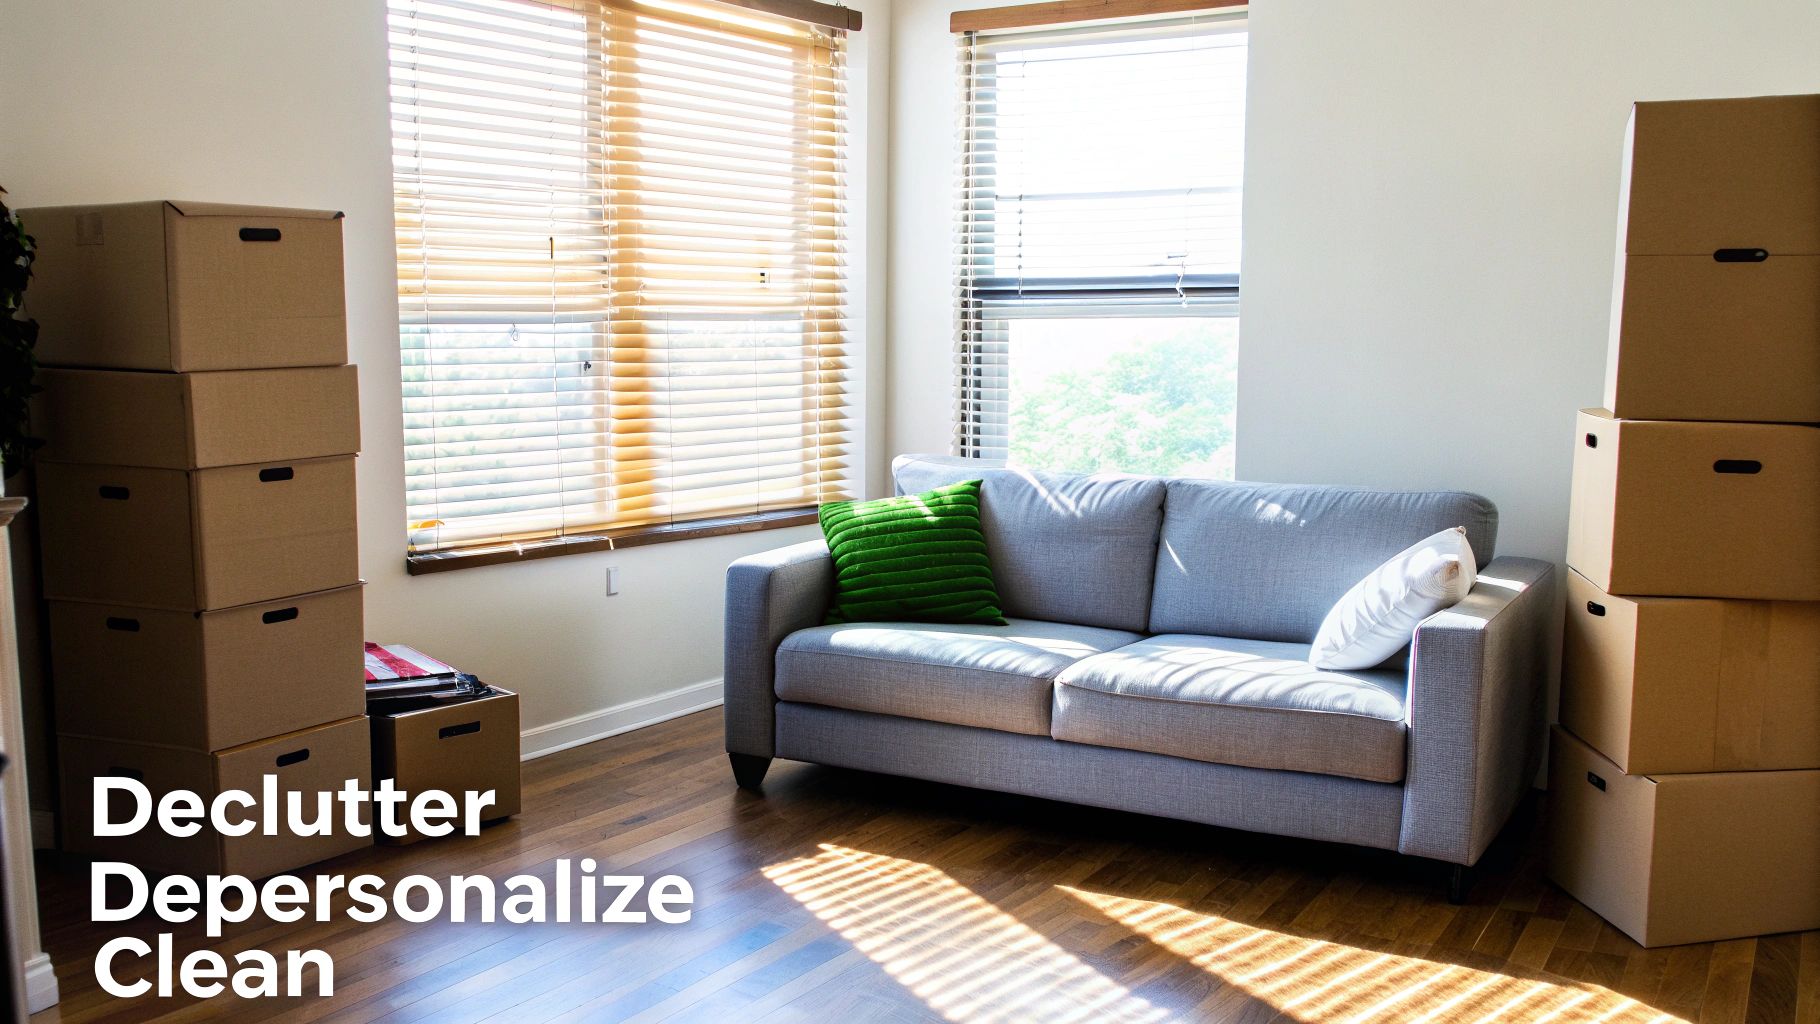
Week 1: Declutter and Depersonalize
This is almost always the heaviest lift. Go through your home room by room and sort everything into four piles: keep, store, donate, or toss. This is also when you’ll pack away family photos, quirky collections, and anything that makes the home feel too yours.Week 2: Deep Clean and Repair
Time to tackle every nook and cranny. Clean the windows until they sparkle, scrub the baseboards, and get to all those minor repairs you identified. A sparkling clean home signals to buyers that it's been well-maintained.Week 3: Painting and Major Tasks
With the house decluttered and clean, it's the perfect time for painting. If you're swapping out old light fixtures or handling any other bigger updates, this is the week to do it.Week 4: Final Staging and Styling
This is where the magic happens. Arrange your furniture to create an inviting flow and show off each room's best features. Add your new decor, layer in textiles like rugs and throws, and bring in plants. Your home is now officially ready for its close-up
The Foundation of Great Staging: Declutter, Depersonalize, and Deep Clean
With your plan locked in, it’s time to get your hands dirty and start the real transformation. This is where you create that clean, inviting canvas that lets buyers stop seeing your house and start seeing their future home.
The entire process really comes down to three core principles: decluttering, depersonalizing, and deep cleaning. These aren't just boxes to check off a list; they work in tandem to make your space feel bigger, brighter, and way more valuable. If you skimp on one, you'll undermine all your other hard work.
Let's break down how to master each one.
The Art of Strategic Decluttering
Most of us have no idea how much stuff we actually own until it’s time to move. For a potential buyer, that clutter is a huge distraction. It makes rooms feel cramped, signals a lack of storage, and pulls their eyes away from your home's best features.
The goal here is pretty ambitious: remove 30% to 50% of your belongings. I know, it sounds drastic, but it's one of the most powerful staging moves you can make. You’re not just tidying up; you're intentionally curating the space to feel open and breezy.
To get a handle on it without feeling totally overwhelmed, try the four-box method. As you go room by room, sort every single item into one of four piles:
- Keep: Essentials you'll use for staging or need day-to-day.
- Store: Extra furniture, out-of-season clothes, and personal collections. These get packed up and moved to a storage unit.
- Donate: Anything in good shape that you just don't need anymore.
- Discard: Broken, expired, or just plain old junk.
When a buyer opens a closet that’s only half-full, their first thought is, "Wow, look at all this storage!" A closet jammed to the brim sends the exact opposite message, even if it's the same size.
Be ruthless. That stack of magazines, the pile of shoes by the door, the crowded kitchen counters—it all has to go. Clearing these surfaces makes a massive, immediate difference.
Depersonalize to Create a Blank Canvas
Next up is depersonalizing. Buyers absolutely need to be able to picture their own lives in your home, and that’s almost impossible when they're staring at your family photos and personal keepsakes. Depersonalizing doesn't mean stripping out all the character; it just means creating a neutral, welcoming backdrop.
Start by packing away anything that screams "you." We're talking family photos, your kids' art off the fridge, sports trophies, and any quirky collections that show off your specific tastes. The bright side? You’re moving anyway, so you're just getting a head start on packing.
Then, take a hard look at your decor. You might love that electric blue accent wall, but it could be a dealbreaker for someone else.
- Swap out highly personal artwork for more generic, appealing pieces like landscapes or simple abstract prints.
- Put away any religious or political items to make sure you don't inadvertently alienate a potential buyer.
- Trade your unique decor for simple, modern accessories that have wider appeal.
The goal is to make your home feel like a stylish-but-approachable model home. You want every person who walks in to think, "I could live here," not, "I wonder what the people who live here are like."
Deep Clean Until It Sparkles
With the clutter gone and personal items packed, it's time for a deep clean. And I don't mean your typical weekend tidy-up. A home that sparkles sends a powerful message to buyers: this property has been cared for. That builds a lot of trust.
If you can swing it, hiring a professional cleaning service for $200-$400 is money well spent. They've got the gear and the know-how to hit spots you might miss. If you're going the DIY route, make a seriously detailed checklist.
Make sure your deep clean hits every surface, especially:
- Windows: Clean them inside and out. It’s amazing how much more natural light you get.
- Baseboards and Trim: Wipe down every baseboard, door frame, and windowsill.
- Light Fixtures: Dust and polish all your light fixtures and ceiling fans.
- Kitchen Appliances: Clean the inside of the oven, microwave, and fridge. Buyers look.
- Bathrooms: Scrub the grout and re-caulk around tubs if it’s looking grimy. Nothing says "yuck" like mildew.
- Carpets: Get them professionally cleaned to pull out any stains and odors.
And please, don't forget about smells. Lingering odors from pets, cooking, or smoke can be a deal-killer. You have to eliminate the source, not just cover it up with air fresheners—that just makes buyers wonder what you’re trying to hide. Nothing beats the simple, non-negotiable appeal of a genuinely clean, fresh-smelling home.
Your Room-by-Room Guide to Expert Staging
Now that you’ve done the hard work of decluttering, depersonalizing, and deep-cleaning, you're looking at a perfect canvas. This is where the real fun begins. Staging is less about decorating and more about storytelling—you're creating scenes that let buyers imagine a life of comfort, style, and ease in your home. It’s all about guiding their eye and making an emotional connection.
We're going to focus on the rooms that really move the needle for buyers: the living room, primary bedroom, kitchen, and bathrooms. The National Association of Realtors has found that these are the spaces where staging makes the biggest difference. If you can nail the presentation here, you're well on your way to a faster, more profitable sale.
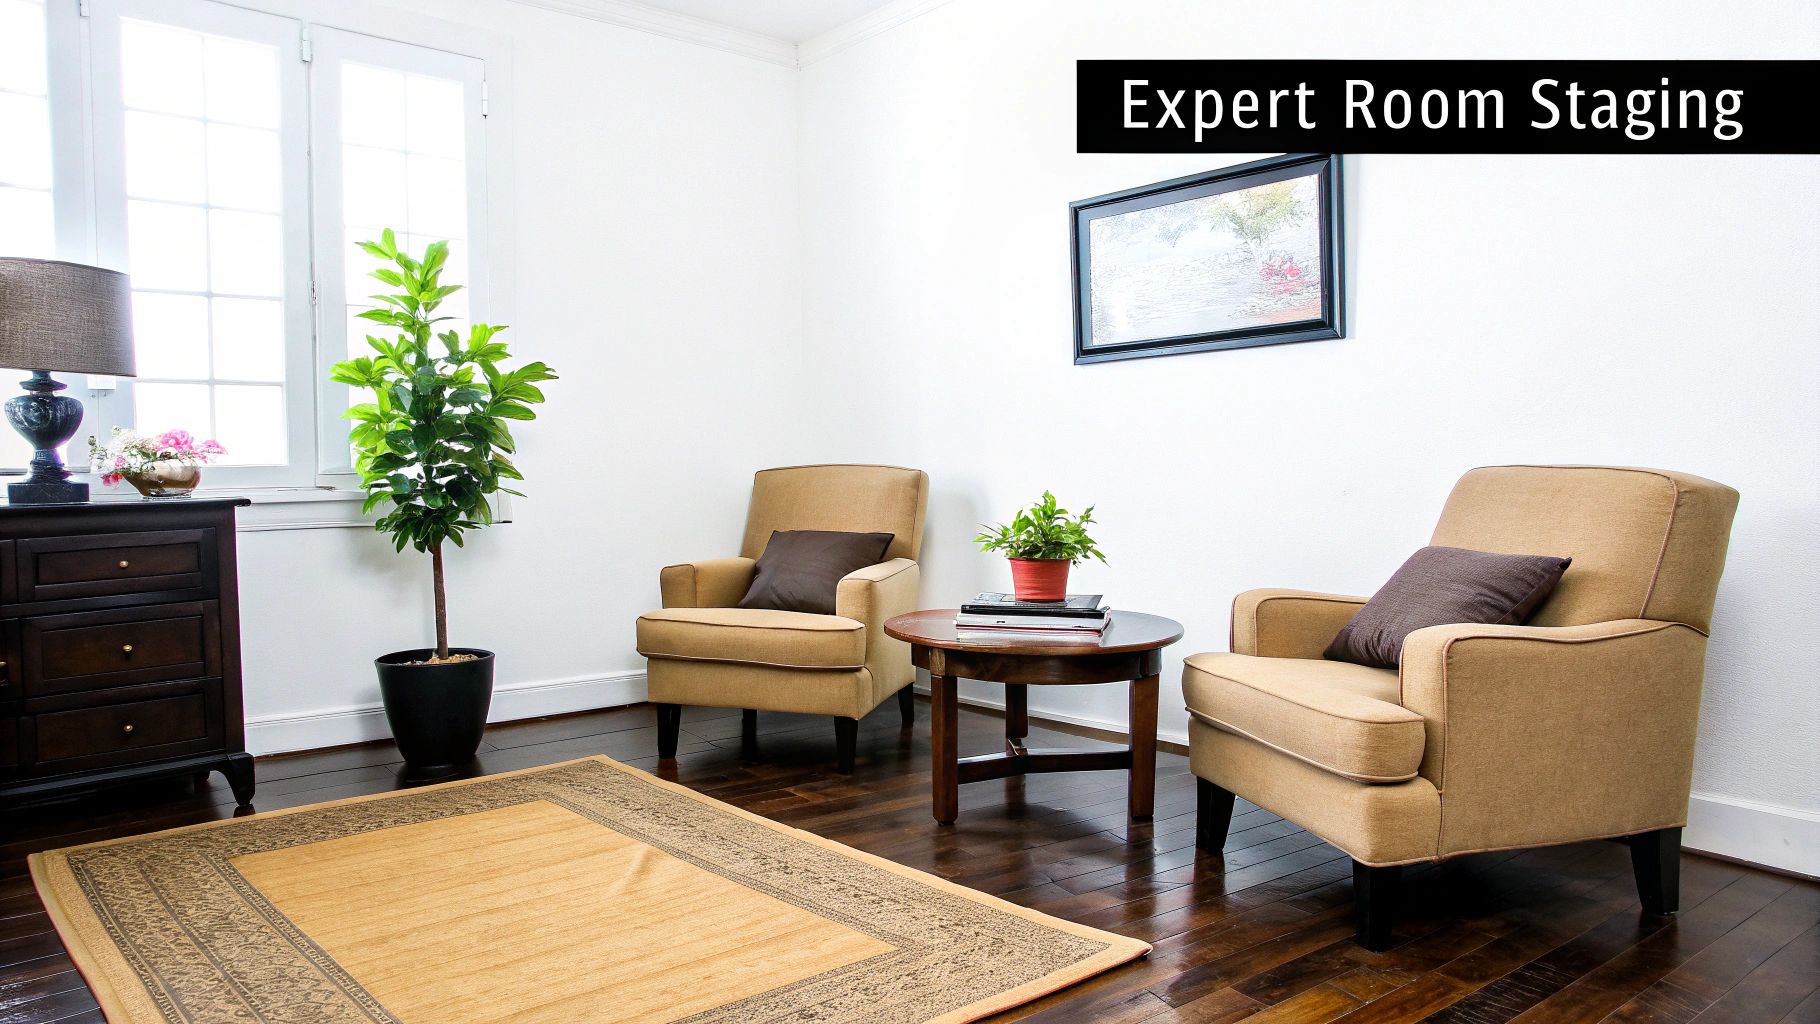
Crafting an Inviting Living Room
The living room is usually the first real impression buyers get of the inside of your home, and it absolutely sets the tone. You want it to feel warm, spacious, and just plain comfortable. The most common mistake I see is people pushing all their furniture right up against the walls. It seems like it would create more space, but it actually makes a room feel smaller and less connected.
Instead, try pulling your furniture away from the walls. Create a cozy, defined conversational area by arranging the sofa and chairs to face each other, maybe anchored by a coffee table and an area rug. This simple shift creates a natural traffic path around the seating area, not through it, which instantly makes the layout feel more intentional and spacious.
A few more tricks to open up the space:
- Let the light in: Pull up all the blinds and open the curtains. If you have heavy, dark drapes, swapping them for something sheer and light can be a game-changer.
- Add a touch of warmth: A simple throw blanket draped over the arm of a sofa or a few well-chosen pillows can make a huge difference.
- Define the focal point: Use your furniture to highlight what makes the room special, whether it’s a beautiful fireplace or a big window with a great view.
For a deeper dive into layouts, take a look at our detailed guide on mastering furniture arrangement tips to really optimize the flow in any space.
Showcasing a Functional and Spotless Kitchen
You've heard it a million times: kitchens sell houses. It's true. Buyers spend more time scrutinizing this room than any other, looking for a clean, modern space with plenty of storage and function. The number one rule? Get everything off the countertops.
Seriously, everything. The toaster, the knife block, the coffee maker—it all has to go. Your goal is to show off every last square inch of that valuable counter space. Once it's completely clear, you can bring back one or two simple, decorative items. A bowl of fresh lemons adds a great pop of color, and a small orchid brings in a touch of class.
Pro Tip: Buyers absolutely will open your cabinets and pantry. Make sure they're neat, organized, and only about half-full. This creates a powerful illusion of abundant storage, which is a huge selling point.
Don't forget to make every surface gleam. Clean the appliances inside and out, polish the sink and faucet until they shine, and wipe down any stainless steel. These details send a strong signal that the home has been well-cared for.
Creating a Serene Primary Bedroom Retreat
The primary bedroom should feel like a peaceful escape. This is the buyer’s future sanctuary, so you want to dial up the relaxation factor. The bed is the undeniable star here, so make sure it's centered on the most prominent wall.
Dress the bed in crisp, neutral bedding—you can never go wrong with white. Add layers to make it look plush and inviting, like a fluffy duvet, a folded quilt at the foot of the bed, and a couple of nice decorative pillows. Keep the nightstands clean and simple; a lamp and maybe a single book are all you need.
To make the room feel bigger and more serene:
- Get rid of any extra furniture that clutters the space, like a bulky dresser or that treadmill in the corner.
- Clear out at least 50% of the items in the closet. You want it to look spacious, not stuffed.
- Make sure there's a clear, easy path to walk on both sides of the bed.
Designing a Spa-Like Bathroom
Bathrooms might be small, but they make a huge impression. The goal is to make every bathroom feel like a bright, clean, spa-like retreat. Start by clearing all your personal toiletries from the counters, shower, and tub. Nobody needs to see your toothbrush or half-used bottles of shampoo.
Go out and buy a new set of fluffy white towels—an inexpensive set just for staging is a great investment. Fold or roll them neatly and place them on a towel bar. A new, neutral-colored shower curtain can also instantly refresh the entire room.
Here’s a quick checklist to get your bathroom show-ready:
- Clear the Counters: Nothing should be out except for a nice bottle of hand soap and maybe a small plant or a candle.
- Scrub Everything: Grout, caulk, and fixtures need to be sparkling. If the caulk is stained, just replace it. It’s a cheap fix that makes a world of difference.
- Hide the Essentials: The toilet brush, plunger, and trash can should be tucked away out of sight before any showings.
By applying these specific strategies to each room, you’re not just showing a house; you're helping buyers truly see themselves living there.
Bringing Empty Rooms to Life with Virtual Staging
Let's face it: not every home is perfectly furnished and ready for its close-up when it's time to sell. An empty room often feels cold and impersonal, and frankly, most buyers have a tough time visualizing how their own life would fit into the space. They can't gauge the scale or imagine where their sofa would go.
This is exactly where virtual staging comes in. It's a game-changer for transforming vacant properties into warm, inviting homes—all done digitally.
Essentially, virtual staging uses specialized software to add stylish furniture, art, and decor to photos of empty rooms. Instead of the headache and cost of renting furniture and coordinating physical stagers, you just need good photos of the empty space. A virtual staging artist then works their magic, creating photorealistic images that show off the property’s true potential. It helps buyers form that crucial emotional connection before they've even walked through the door.
When Does Digital Staging Make the Most Sense?
I've found this approach is a lifesaver in a few key scenarios. If you're listing a completely vacant house, it's an incredibly cost-effective way to show buyers how cozy and functional the space can be. It’s also brilliant for tackling those awkward, hard-to-define rooms—that oddly shaped bonus room or massive basement, for instance. You can show it as a home office in one photo, a gym in another, and a kids' playroom in a third, sparking all sorts of ideas for potential buyers.
Virtual staging bridges the imagination gap. For a fraction of the cost of physical staging, it allows you to present a polished, move-in-ready vision that appeals directly to online house hunters.
The cost difference is huge. Physical staging can easily run into the thousands. On the other hand, digitally furnishing a room can cost as little as $25 to $150 per photo. This puts it well within reach for almost any listing budget. If you want to dive deeper, we have a whole guide on the benefits of virtual staging for real estate.
This comparison really says it all—a vacant room next to its virtually staged version.
You can immediately see how the "after" shot adds warmth and defines the purpose of the space. It gives buyers a clear sense of scale and function.
Best Practices: Keep it Honest and High-Quality
Virtual staging is an incredible tool, but it has to be used ethically. The number one rule is to be completely transparent. Always disclose that the photos have been digitally furnished. You can add a simple watermark like "Virtually Staged" or use the disclosure fields provided on most listing platforms. Honesty builds trust and prevents that awkward moment when buyers show up expecting a fully furnished home and find it empty.
To get the best results, keep these tips in mind:
- Start with Great Photos: The final image is only as good as the original. Use professional, high-resolution photos with excellent lighting. It’s the foundation for a believable result.
- Match the Vibe: Make sure the digital furniture fits the home's style and price point. Sleek, modern furniture will look out of place in a charming historic Victorian.
- Enhance, Don't Hide: The goal is to showcase potential, not to cover up problems. Never use digital furniture to hide damaged floors, wall cracks, or other flaws. Be upfront about the property's actual condition.
Putting the Finishing Touches on for Photos and Showings
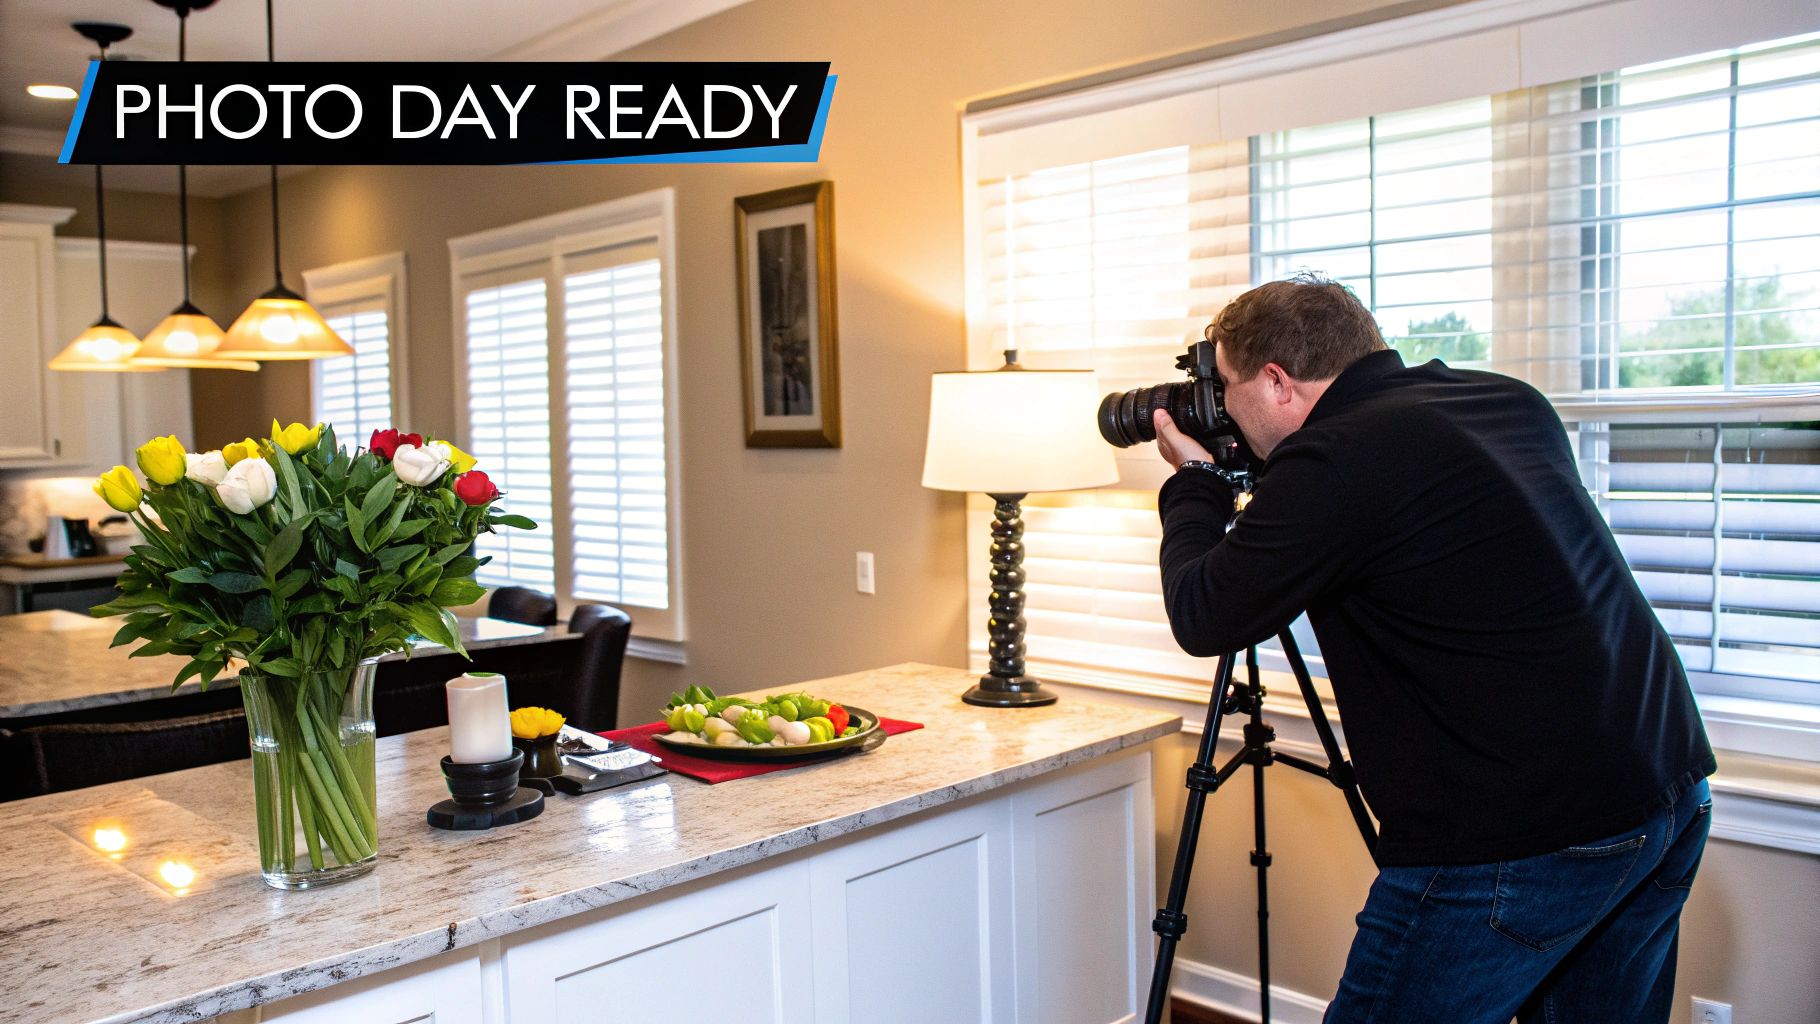
You’ve done the heavy lifting—the decluttering, the deep cleaning, and the thoughtful styling. But the final moments before the photographer arrives or the first buyers walk through the door are where the magic really happens. This is your chance to make sure all that effort shines.
The goal now is to create an atmosphere that feels bright, warm, and genuinely welcoming. A dark or stuffy house can be an instant turn-off, no matter how well it's staged. These last-minute details are what make a space feel like a home.
Your Pre-Showing Ritual
Think of this as your five-minute drill before go-time. Running through this quick checklist ensures your home is presented in its absolute best light, every single time. It’s a simple routine, but its impact is huge.
- Flip Every Switch: Yes, even in broad daylight. Turn on every single lamp—table lamps, floor lamps, and overhead fixtures. This creates a warm, layered glow that banishes shadows and makes the home feel incredibly inviting in photos and in person.
- Let the Light In: Natural light is a seller's best friend. Throw open every blind, curtain, and shade. You want to flood each room with as much light as possible to make the space feel bigger, brighter, and more cheerful.
- Add a Touch of Life: Something as simple as a vase of fresh flowers on the entry table or a bowl of crisp green apples on the kitchen counter adds a pop of vibrant color. These small details signal that the home is fresh and well cared for.
One of the biggest mistakes I see people make when staging their own home is forgetting to appeal to all the senses. A subtle, clean scent—think fresh linen or light citrus—can create a powerful, positive memory. Just be sure to avoid overpowering plug-ins; they can make buyers think you're trying to hide something.
Be Ready for Last-Minute Viewings
In a hot market, you have to be ready for those "we're in the neighborhood, can we see it now?" calls. Being prepared means you can say "yes" without panicking. The secret is a "showing kit."
Keep a laundry basket tucked away in a closet. When you get a last-minute request, do a quick sweep of the house and toss any stray clutter—the mail on the counter, the kids' shoes by the door, the dog's toy—into the basket. Grab it on your way out the door and stash it in your car. With this simple trick, you're never more than a few minutes away from being perfectly show-ready.
Common Questions About Staging a Home
Jumping into home staging for the first time? It's natural to have a few questions. I've heard them all over the years, so let's clear up some of the most common ones sellers ask.
What’s the Real Cost of Home Staging?
This is the big one, and the honest answer is: it depends. A good starting point is to budget between 1% and 3% of your home's asking price.
If your home is completely empty, you'll be looking at a professional service, which can run anywhere from $2,000 to $7,000+. That typically covers the initial design consultation and the monthly cost of renting furniture and decor. On the other hand, if you're still living in the house, a consultation might just be a few hundred dollars, with the stager helping you rearrange and edit your own belongings for maximum impact.
Is It Worth Staging a Vacant House?
Without a doubt, yes. I’ve seen it time and time again—empty rooms almost always look smaller and feel sterile to potential buyers. It's hard for them to picture where their own sofa would go or how big a king-size bed feels in the space.
Staging gives each room a clear purpose and helps buyers form an emotional connection. You don't have to go all out; even light staging in the living room and primary bedroom can make a world of difference.
Don't just take my word for it. Industry data shows 77% of buyers say staging makes it easier to visualize a property as their future home. That visualization is exactly what you need to get a strong, quick offer.
Can I Live in My House While It's Staged?
Absolutely, and most of my clients do. It just requires a bit of discipline. The trick is to keep it "show ready" at all times.
This means you’ll need to make the beds perfectly every single morning, keep countertops and surfaces completely clear, and stash away all your personal stuff. I always recommend clients create a "showing kit"—a couple of laundry baskets or bins they can quickly fill with daily clutter and hide in the car before a viewing. It’s a bit of work, but it’s completely doable.
If I’m on a Budget, Which Rooms Should I Focus On?
When you can't stage the whole house, you have to be strategic. Focus your energy and budget on the rooms that leave the biggest impression on buyers.
Based on feedback from thousands of real estate agents, here’s your priority list:
- The Living Room: This is the first major interior space buyers see, and it sets the tone for the entire home.
- The Primary Bedroom: Buyers are looking for a peaceful, spacious sanctuary where they can unwind.
- The Kitchen: A sparkling clean and organized kitchen is a huge selling point and can often seal the deal.
Ready to see what your home could look like? AiRoom can take your current room photos and generate professionally-staged designs in just a few minutes. It's a fantastic way to play with different styles and find the perfect look before you lift a finger. Experiment with your own space at https://www.renderroomstudio.com.